Classic Lift Maintenance Manual for Direct-Drive Two Post Hoists
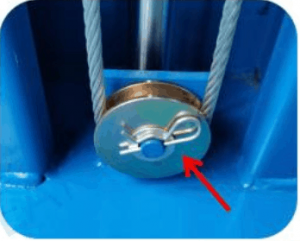
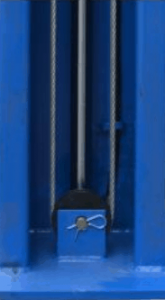
- Daily check items before using 1. Visual check the following parts, and make sure no looseness or fall-out:
Visual check elastic pins
- Check the operation status of the safety device, make sure it locks & unlocks properly, and adjust the safety device cable if it can’t be unlocked properly.

Visual check rubber pads wear, replace if necessary
Type 1 of Safety device
Normal unlocking state of safety device
Adjusting way of safety device cable: lift the carriage and lock it loosen the locking nut. Tighten the safety device cable, and loosen it a little, then tighten the locking nut. Make sure the safety device could lock the carriage safely after adjusting and the lift arms could be opened swimmingly.
Also, check the position of the limit screw and nut on the power side safety device. It needs to be adjusted to the position as shown in the figure.
Type 2 of Safety device
Normally, the off-side safety block should be like the above figure after pressing down the safety handle.
Adjusting way of safety device cable:
Adjusting way of safety device cable: lift up the carriage and lock it and loosen the locking nut. Tighten the safety device cable and loosen it a little, then tighten the locking nut. Make sure the safety device could lock the carriage safely after adjusting and the lift arms could be opened swimmingly.
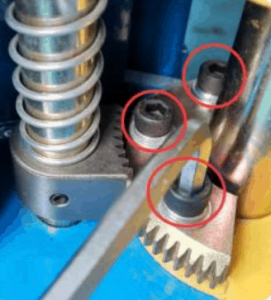
- Check the working condition of the arm lock and moon gear, and make sure they mesh properly.

If it doesn’t mesh properly, please loosen the 3 screws for adjusting the clearance of the armlock. And moon gear, and retighten once mesh well.
- Please keep the surface and periphery of the lift clean during daily use.
- In order to extend the service life of the oil cylinder, please ensure that the lift. Could finish a whole stroke of raising and lowering at least once a day.
- Monthly check items
- Check all screws whether there are loose.
If yes, please tighten them.
- Check and tighten the anchor bolts, the torque is about 150Nm.
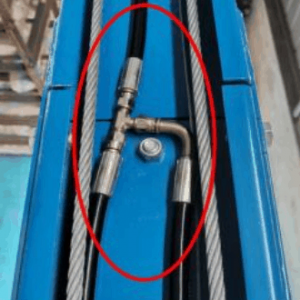
- Check the part of the oil line.

3A. Inspect the oil hose for any breakage, whether there is loosening or oil leakage in the joint position if yes please replace or tighten.
3B. Check whether there is oil leakage in each valve position of the power unit, if yes, please replace or tighten.
- Check cable whether synchronized and adjust if not.
Observe the running state of the carriage on both sides of the lift during rising and lowering. If it cannot run synchronously, the cable on the side running slower should be tightened. It can also be judged by listening to the “crack” sounds made by the safety device. If the two sounds are made at the same time, it is synchronous. Also, if the sounds are one follows another, then the cable on the slower side should be tightened.
If the carriage on both sides cannot run synchronously during the rising and lowering. Adjustment bolt, please adjust the adjustment bolt on the slower side until synchronized.
- Check the cable wear, and replace it timely if there are broken wires.
-

check for cable wear Check the outer surface of the cylinder piston rod and dust ring, keep it clean, and remove greasy dirt, dust, and iron filings in time.
- Check whether the limit switch of the control bar works properly. (Only clear floor-type lifts)
- Apply grease to the moving parts, driving parts, and column chutes for lubrication. •
Checking items per six months
- Check the wire connection of the control box:
- Check whether the column is vertical on the ground with a level bar:
Add the adjustment washers under the anchor bot of the lower side if the column is not vertical
- Annually checking items:
- Replace the hydraulic oil 3 months after the first installation, and then replace it once a year. (46 anti-wear hydraulic oil is recommended)
- Check and clean each valve on the power unit.
Remove each valve in turn, clean with an air gun, and wash with mild detergent.
- Check and clean the inlet pipe filter of the power unit, and remove the iron filings on the magnet.
Remove the oil tank, screw off the inlet pipe filter anticlockwise, and clean, also the iron filings on a magnet.
- Clean the oil lines.
Take apart the oil hose, and clean the internal debris of the oil lines with the air gun.
